New Project
New Project allows you to configure the parameters for each project you create. When creating a new project, a drop down menu will appear where you can specify which client you want to assign the project to. If you haven’t created a client yet, the drop down will be empty. Multiple projects can be set up within clients. Projects set up for a specific client can only be seen by users associated with that specific client or project.
- Click on the Project Creation tab
- Click New Project
- Select a client from the drop down menu
- Add specific project details
- Click the “Add New Project” button to add your project
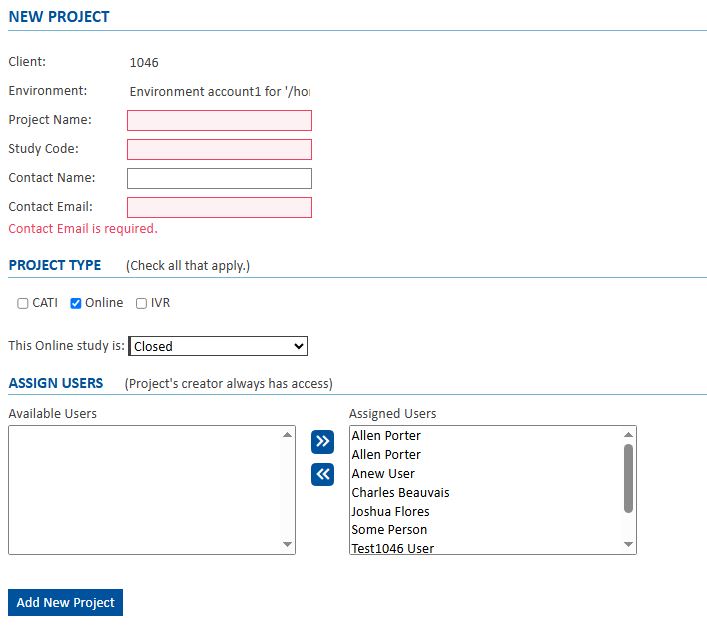
Project Specific Details
| Parameter | Description | |
|---|---|---|
| Client | You must assign your project to a client. This client and the users associated with this client will have access to the project you are creating. | |
| Project Name | Project description. This text will appear on the index.php when interviewing. This text will also appear in all subsequent drop down menus within the console. | |
| Study Code | Name given to a project. This is limited to 32 characters and MUST start with an alpha character. Only letters, numbers and underscores are allowed in the name. Spaces are not accepted. | |
| Environment | An environment is a “place” where the Survox Console software is installed on a particular machine. A drop down menu will contain all environments available to the user setting up the project. The Environment is Required to setup a project. | |
| Start Date | Date for project to begin – Informational Only | |
| End Date | Date for project to end – Informational Only | |
| Contact Name | Automatically filled in with the user’s name of who is creating the project. This can be edited. | |
| Contact Email | Automatically filled in with the user’s email address of who is creating the project. This can be edited. | |
| Project Type | Modes assigned for project. Multiple modes can be assigned. Each mode generates different types of specs as well as different paths where the study files are stored. However, when testing or deploying your project, the same fone, data and quota files are copied into the $CFMC area where they are accessed regardless of which mode you have built your study with. | |
| CATI | Terminal Interviews. These files are stored in a cati subdirectory. | |
| IVR | IVR-Interactive Voice Response. These files are stored in a IVR subdirectory. For Inbound/Outbound IVR choose IVR mode. For Blended choose IVR and either CATI or WebCATI modes. | |
| webCATI | Web Interviews designed for trained interviewers using telephones to call respondents with some form of sample and quota control. These files are stored in a webcati subdirectory. | |
| webSURVENT | Web studies designed for respondents who can access the study at their leisure. WebSurvent studies can be open or closed. Open studies do not require passwords and allow anyone into the survey (even multiple times). Closed studies do require passwords and allow the respondent to only complete the survey once. These files are stored in a websurvent subdirectory. | |
| Assign Users | A listing of “Available Users” will appear in a box on the left and a listing of “Assigned Users” will appear in a box on the right. If a user is in the “Assigned” box, they will have access to this project. If a user is in the “Available” box, that means they are available but not yet assigned to this project. To move a user from each box, click on the user and then click on the left/right arrow buttons. | |